Inkjet printers present their own set of problems but overall I’d say inkjet printers are average difficulty to clear paper jams. Inkjet printers have a simple paper path but they aren’t easy to access.
A printer jams from time to time. When they do it can be frustrating. Like any printer repair technician, I’ve removed many paper jams.
If you need to remove a paper Jam in your Inkjet Printer then this is the best way to do it:
- Unplug power
- Remove paper from paper tray
- Open all doors and assess the situation
- Pull paper from different directions to find the least resistance
- Keep any bits of removed paper to be sure you got everything
- Close all doors or access points
- Plug in power
- Before loading paper fan all the edges
- Ready to print again
Unplug Power
The first step to remove a paper jam is to remove the power source. It ensures any electrical components aren’t damaged.
Manufacturers are required to use door switches to cut power so there is little chance being shocked. Besides, there is no high voltage. Inkjet printers operate on 5 VDC and 24 VDC.
Removing power also resets and clears the memory. Printers glitch occasionally during the process of removing paper jams. Unplugging it eliminates the possibility.
Remove Paper from Tray
The next step is to remove any paper from the supply and exit trays. I’ve found this prevents any damage to the paper as well as the trays.
You’re going to be moving the printer around and opening doors. It’s easy for the paper in inkjet printers to fall out or catch on something.
It’s best to just remove the paper now and set it aside.
Assess the Situation
The next step is to evaluate the paper jam.
- Which access point is easiest to remove the paper jam?
- Should I remove my ink cartridges?
- Do I need any tools?
Instead of pulling the paper out the first door you open, check other access points. The paper may be easier to remove from another place.
Some inkjet printers need to flipped up to open rear doors. In those cases you should remove the ink cartridges.
Ink cartridges should be kept level so air bubbles don’t get into the nozzles. New cartridges have more ink than air so it’s unlikely to happen. But used cartridges have more air.
It’s best to remove ink cartridges before flipping your printer upside down to remove a paper jam.
While examining the paper jam you should consider if you need any tools. A flashlight is an essential tool for removing paper jams.
Do not use any metal tools to remove a paper jam. However, wood or flexible plastic are fine.
A folded sheet of paper makes a good tool to pull, push, or hook corners of jammed paper.
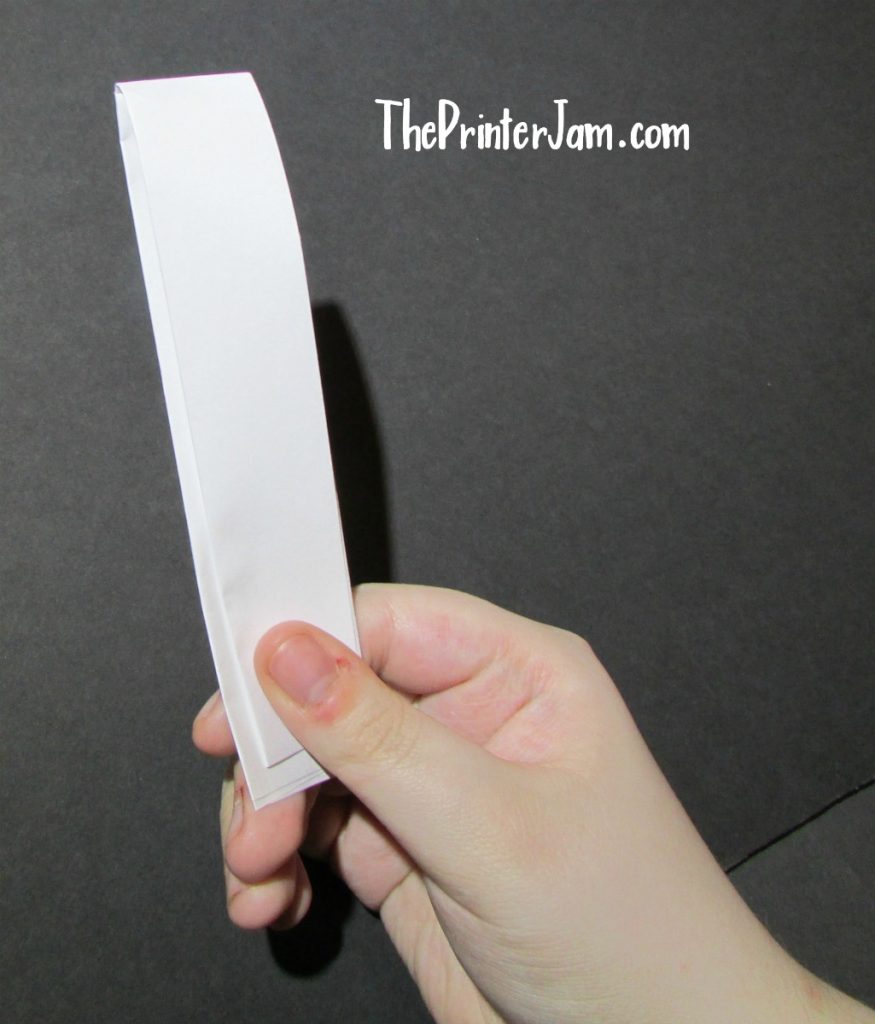
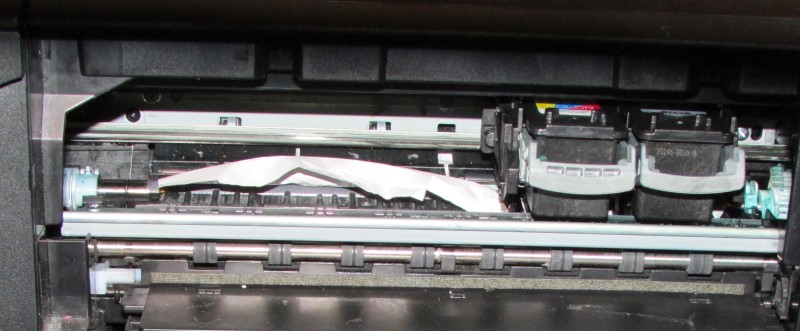
Pull the Paper Jam Out
Once you’ve assessed the situation to figure the best way to remove the paper jam. The next step is to gently pull the paper jam out.
A general rule of thumb when removing paper jams is to pull the same direction the paper is feed. The best way to do this is to start where the paper exits and work your way back to the paper supply tray.
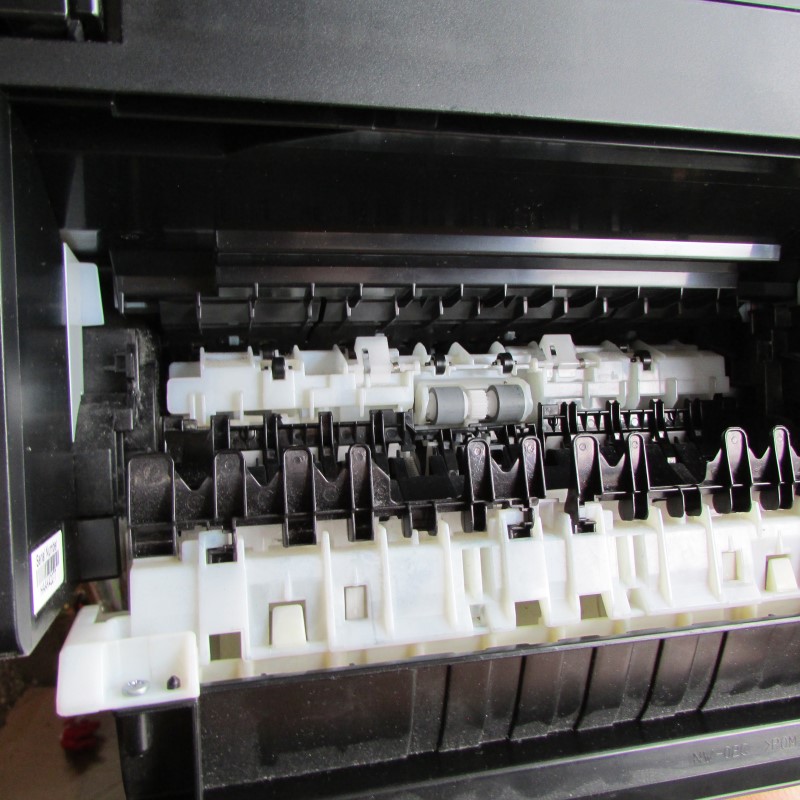
It’s simpler to just pull a sheet of paper out the paper tray if you can reach it. But this adds wear to the feed rollers. Opening the rear door and pulling out a paper jam from there allows the rollers to move freely.
As you work your way from the exit to the paper supply, pull any paper jams toward the exit if you can. In some cases you have no choice. I’ve found tugging an the paper from different angles reveals the path of least resistance.
There isn’t much room to maneuver inside inkjet printers. But try as many angles as you can. The less resistance there is the less likely the paper is to tear.
Don’t worry if the paper tears as it’s coming out. Sometimes it’s unavoidable.
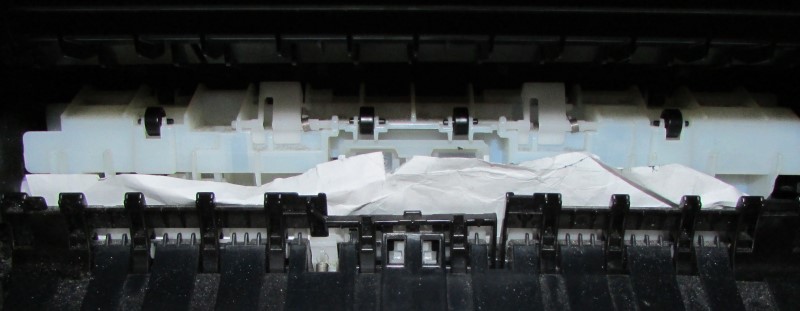
Keep All Pieces of Paper
Be sure to keep all the paper you pull out. Even if it looks like a fully intact sheet of paper, flatten it out and check to make sure.
It’s easy for a tiny bit of the corner to tear off. These bits of paper can hide in the paper path and cause more paper jams.
Be sure to check all the paper jams you pull out to see that they are intact. Use a flashlight to see any bits of paper inside your inkjet printer.
Close Everything Up
Once you’re sure all the paper has been removed. The next step is to close all the doors, guides, and latches. Put back any ink cartridges or maintenance cartridges you had to remove.
It’s easy to leave a latch or door not fully engaged. This can cause printer errors or grinding noises when the printer boots up.
Plug in Power
After everything is buttoned up and ready to go the next step is to add power. Let the printer boot up before adding paper.
As boots does listen for any unusual noises. All inkjet printers make weird noises but listen for any loud clicking or grinding noises.
If it does, turn the printer off and remove power. Then check to see if the carriage unit moves freely. Cartridges or latches not seated are common causes. Misaligned doors can also cause issues.
False Paper Jams
When booting back up your printer could display a paper jam. If there’s no jammed paper inside yet your printer says it’s jammed. This is a false paper jam. There are two possibilities:
- The software has glitched and the printer is stuck in a jam state. Which is unlikely since you already removed power and rebooted.
- A paper sensor is still activated. It’s likely a small bit of paper has torn off and activating a paper sensor. Inkjet printers typically only have one or two paper sensors. Use a flashlight to check them for obstructions.
Fan the Paper
Once your printer boots up and is at a ready state you can load the paper. Be sure to fan all four edges.
It only takes a tiny amount of glue from the packaging for paper to stick together. If the blade the factory used to cut the paper has a slight imperfection. Then the frayed edges of the paper can stick together.
While fanning the paper the glue or frayed edges aren’t noticeable. Nonetheless, you should always fan all the edges of the paper before loading it.
Ready to Print Again
Now that everything is well with your printer you can print again. Hopefully, the paper jam was just a fluke and it won’t happen again. There are steps you can take to prevent them.
Paper jams can’t be completely eliminated in inkjet printers. So follow these steps to remove paper paper jams whenever your inkjet printer jams!
FAQ
Unplug the printer and open all the doors. Use your fingers to gently tug the paper out. Do not use any metal tools to pull out a paper jam. If you can’t reach the paper jam a popsicle stick or folded sheet of paper are best to unjam a printer.
You have to remove any paper triggering a paper sensor. Then open and close every door to get the printer to initiate a self test to check the paper sensors again. If the printer fails to clear a paper jam state, then unplug power and reboot it.
The causes of paper jams in an inkjet printer range from dirty paper feed rollers, improperly loaded paper, or to an obstruction.

The Copier Guy, aka Dave. I’ve worked on scanners, printers, copiers, and faxes since 1994. When I’m not fixing them I’m writing about them. Although, I’m probably better at fixing them. I’ve worked with every major brand. As well as several types of processes. If it uses paper I’ve probably worked on one.